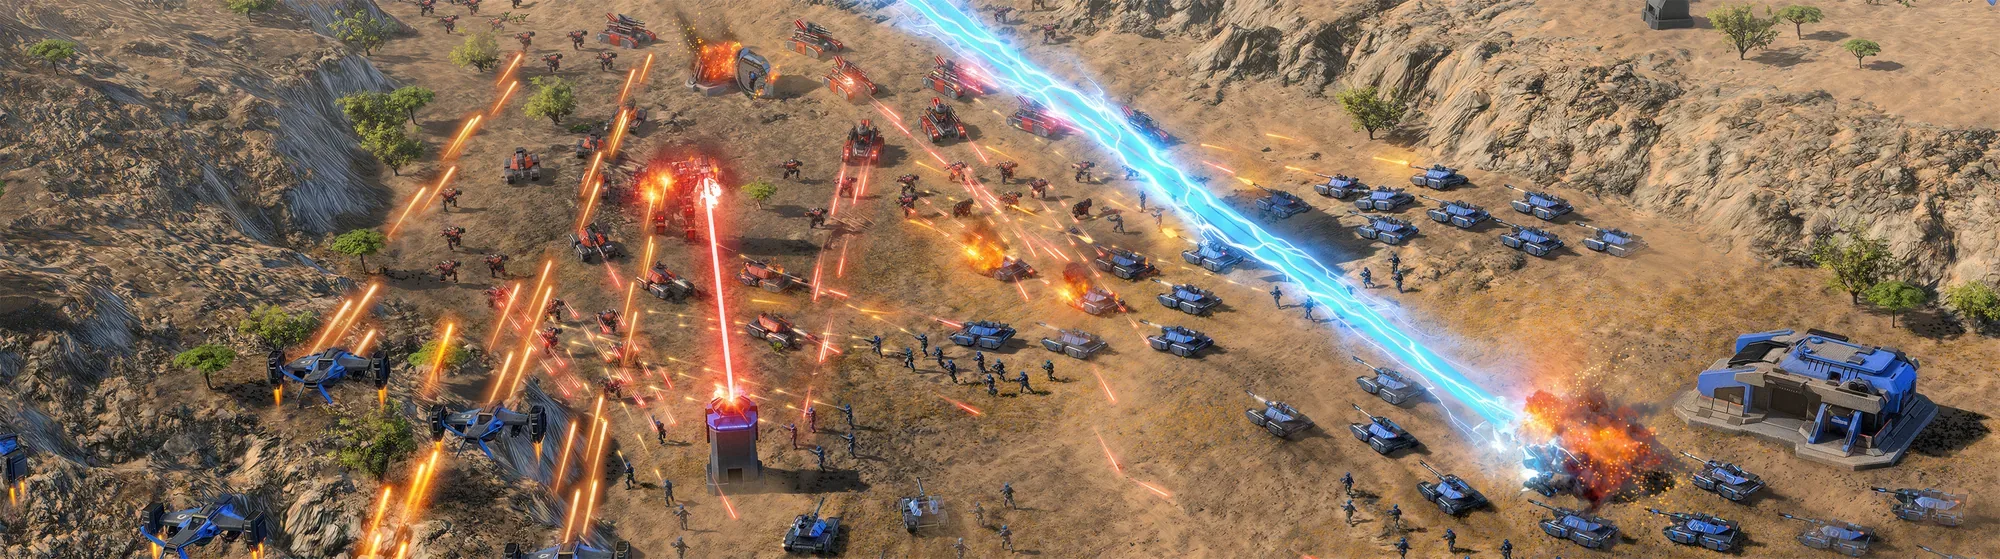
Quick brief
- Every unit belongs to an army; the army is the order-giving layer.
- Formations place close-range units forward and ranged units behind, but manual positioning still matters.
- Reinforcement follows the army, using suitable production buildings and rally points.
- Army cohesion does not remove the need to retreat, split or adjust facing.
Every army game eventually asks how much of the battle you should personally conduct. Ashes II answers with a structure: every unit belongs to an army, and armies are how you move, fight and reinforce.
This is not a cosmetic grouping. It changes what a “unit” means. You are managing a formation with a job, not a stream of individual vehicles.
Army, unit, element: three layers
The developers describe three levels of movement and command:
- Army — the formation you select and order.
- Unit — a squad or vehicle within the army.
- Element — the individual soldiers, tanks or drones that do the fighting and take the damage.
The pathfinding system runs at all three levels. An army calculates a route across the map, units find their place in the formation, and elements handle local movement. This is why a mixed army can cross a large map without you hand-holding every vehicle.
The practical takeaway is simple: give the army a destination and a purpose, then intervene where the plan breaks.
The army control loop
A healthy command loop looks like this:
- Select the army. You are choosing a formation with a role, not a random box of units.
- Move with intent. The destination should create an advantage: a flank, a defended region, a choke, a fresh angle.
- Set facing. Armies can be turned to meet an expected threat. Do this before contact, especially when defending a pass or covering a production region.
- Engage or refuse. Let the army’s local behaviour handle nearby threats, but decide whether this is a fight worth finishing.
- Split or merge. Detach a recon screen, bring a second army together for a decisive push, or break off damaged units.
- Reinforce. Add new units to the army rather than creating a second force that arrives in pieces.
The loop is deliberately not a click-fest. The important decisions are the destination and the commitment.
Formations: what the game does for you
Stardock updated formations after the February 2026 demo. Armies now organise themselves into ranks:
- close-range damage dealers and durable units form the front line;
- less-armoured, longer-ranged units form the back ranks.
That is a sensible default, but it is not an invincibility button. A formation knows where units prefer to stand. It does not know that the enemy has a battery of artillery behind the ridge on your left, or that the shortest path to the destination runs through a kill zone.
Three habits that make formations work
Look at the approach, not just the destination. If the army must cross a narrow bridge or trench line, a wide formation becomes a queue. Send a smaller force through or clear the far side first.
Adjust facing. A line facing the wrong direction can be flanked while its long-range units are still turning. When you know where the attack is coming from, set the army’s facing accordingly.
Separate jobs. A recon army should not be forced to move at the speed of your heaviest tank. A main battle army should not have to wait for a siege unit that was left behind. Create small, task-specific armies and merge them only when necessary.
Reinforcement is part of the formation
The army system is tightly connected to production. When you reinforce an existing army, new units are recruited into that army and move to join it. The closest suitable production facilities contribute. The army becomes the rally point.
This is one of the most important logistical tools in the game. It means you can keep a push alive without manually rebuilding a control group after every engagement.
But automatic reinforcement can also create a trap. If the army is slowly losing a fight in a bad position, new units may keep arriving at the same bad position. Automatic does not mean strategic.
Ask two questions before switching on a long reinforcement stream:
- Can I win here? If not, stop feeding the fight and redirect production.
- Is the route safe? A rally path through an enemy flank is a donation.
The development journals also describe smarter production and forward deployment. A factory close to the front shortens the trip and makes reinforcements more useful. That is a real advantage, but it creates a real target. The opponent can attack the factory or the region link that powers it.
Build armies around jobs, not around unit counts
A reliable way to design a task force is to define the job first.
Recon army
Fast units whose job is to find the enemy, check expansions and watch for a flank. Do not attach your slowest, most expensive unit just because you want it protected. Recon that cannot move is no longer recon.
Main line army
The force that holds space. It needs enough durability to survive contact and enough ranged damage to punish anything that tries to close. Formations put these pieces in the right order by default.
Anti-air / escort group
Air threats are their own problem. Build a group that can travel with the main army rather than hoping one anti-air unit will cover the whole map.
Siege or fire-support group
Artillery and long-range units want a line in front of them. They should be part of the army plan, not a cluster of tools you bring along without support.
Strike reserve
A second army positioned behind the main line can respond to a breakthrough, exploit a win or cover a retreat. It does not need to be the biggest army. It needs to be in the right place.
These are roles, not a mandated ratio. The correct mix depends on the map, your opponent and what your production can sustain.
Army cohesion and terrain
Army cohesion is designed to keep a mixed force moving as a body instead of spreading into a long, vulnerable line. Terrain still bends the formation. A forest, a cliff edge or a crater field can compress the army or force units into single file.
Two practical consequences:
- Chokepoints turn cohesion into a bottleneck. The army arrives together, but the leading units may meet the enemy alone. Clear the choke or use artillery before pushing through.
- Open ground is not automatically safer. It exposes your formation to long-range fire from multiple angles. A good formation on open ground still needs scouting and anti-air.
Unit upgrades and army risk
The July 2026 unit upgrade preview introduced another layer of risk. Upgraded units gain health, weapons and modules, but losing one throws away the investment.
At army level, this creates an interesting tension. If you upgrade a centerpiece unit, the army must protect it. If you upgrade many units, one bad engagement can erase a large amount of production. There is no single correct answer. The point is to notice that you are making a bet.
Six drills for better army control
1. The 30-second read
Play a skirmish, zoom out, and describe the map in 30 seconds: where your army is, where production is, where the enemy is likely to come from. Repeat every few minutes. This trains the strategic view.
2. The single-army push
Build one army and try to take three connected regions with it. Do not add a second army until the first has a clear job. You will notice faster when the army lacks anti-air, recon or a front line.
3. The deliberate retreat
Enter a fight you know you cannot win, pull back before the army disintegrates, then reinforce and attack from a different angle. This teaches you to treat the army as a resource, not a scoreboard.
4. The split
Break off a small fast group, scout, and rejoin. If you cannot manage that without losing the main army, your command scheme is too complicated.
5. The choke test
Find a narrow approach and try to take it without artillery or a flank. Then try again with a plan for the choke. Compare how much of your army survives. This is how terrain lessons become intuitive.
6. The reinforcement audit
After a 20-minute skirmish, look at where your production was relative to your fights. Ask whether new units spent more time travelling or fighting. That single observation will improve your next match more than a new build order.
What the army system does not do
It does not choose the right fight. It does not stop you from pushing into a prepared killing field. It does not make anti-air unnecessary. It does not replace scouting.
It removes the tax of moving dozens of units individually. The strategy remains yours.
The bottom line
Use armies to execute decisions, not to hide the absence of decisions. Give each formation a job, put production within reach, adjust facing before contact, and cut off reinforcement when a battle stops being worth winning.
Evidence log
Sources & method
This guide uses official Stardock and Oxide Games material wherever possible. Strategy advice is our own interpretation of those systems, not a claim about a hidden optimal build. Values and balance can change between the pre-release build and launch. Last verified November 1, 2026.
Continue the briefing